Over the previous articles, we have explored the architecture and capabilities required to build a client side, session-aware Voice AI agent. In Part 1, we examined why client-side tool calling is the best approach. Part 2 detailed the Virtual Web Session and Session Extension architecture, and Part 3 covered the specific perception and action tools that give an agent its digital "eyes and hands."
Now, it is time to put that theory into practice. This guide covers two ways to connect ElevenLabs to Webfuse so a voice agent can understand a live page and act inside it:
- MCP integration - using ElevenLabs with Webfuse Session MCP
- Widget integration - using ElevenLabs client tools wired through a Webfuse extension
By the end of this tutorial, you will understand both paths and have a clear implementation flow for each.
What You Will Need (Prerequisites):
Before we begin, please ensure you have the following:
- An ElevenLabs Account: You will need access to the ElevenLabs platform to create and configure the voice agent.
- A Webfuse Account: A Webfuse account is required to create a SPACE and deploy the Session Extension.
- A Code Editor: Any text editor will work, but a code editor like Visual Studio Code is recommended.
- Basic Knowledge of HTML and JavaScript: You do not need to be an expert, but a fundamental understanding will help as we review the extension files and integration flow.
The Process: A High-Level Overview
This article is split into two implementation paths:
- Part 1: MCP Integration
- configure the ElevenLabs agent for MCP
- pass the required dynamic variables into the session
- connect the agent to Webfuse Session MCP
- deploy and test the flow live
- Part 2: Widget Integration
- configure the ElevenLabs agent
- wire client tools through the extension
- upload the extension to a Webfuse SPACE
- launch and test the agent live
Part 1: MCP Integration
We will start with the MCP-based integration. In this setup, ElevenLabs connects to Webfuse through Session MCP, which gives the agent access to the live browser session without manually wiring individual client tools in the extension.
If you want to follow the ElevenLabs screens as you go, use this walkthrough:
Use the walkthrough for the UI steps, and follow the repository for the exact implementation details we reference below.
Step 1: Configure the ElevenLabs Agent for MCP
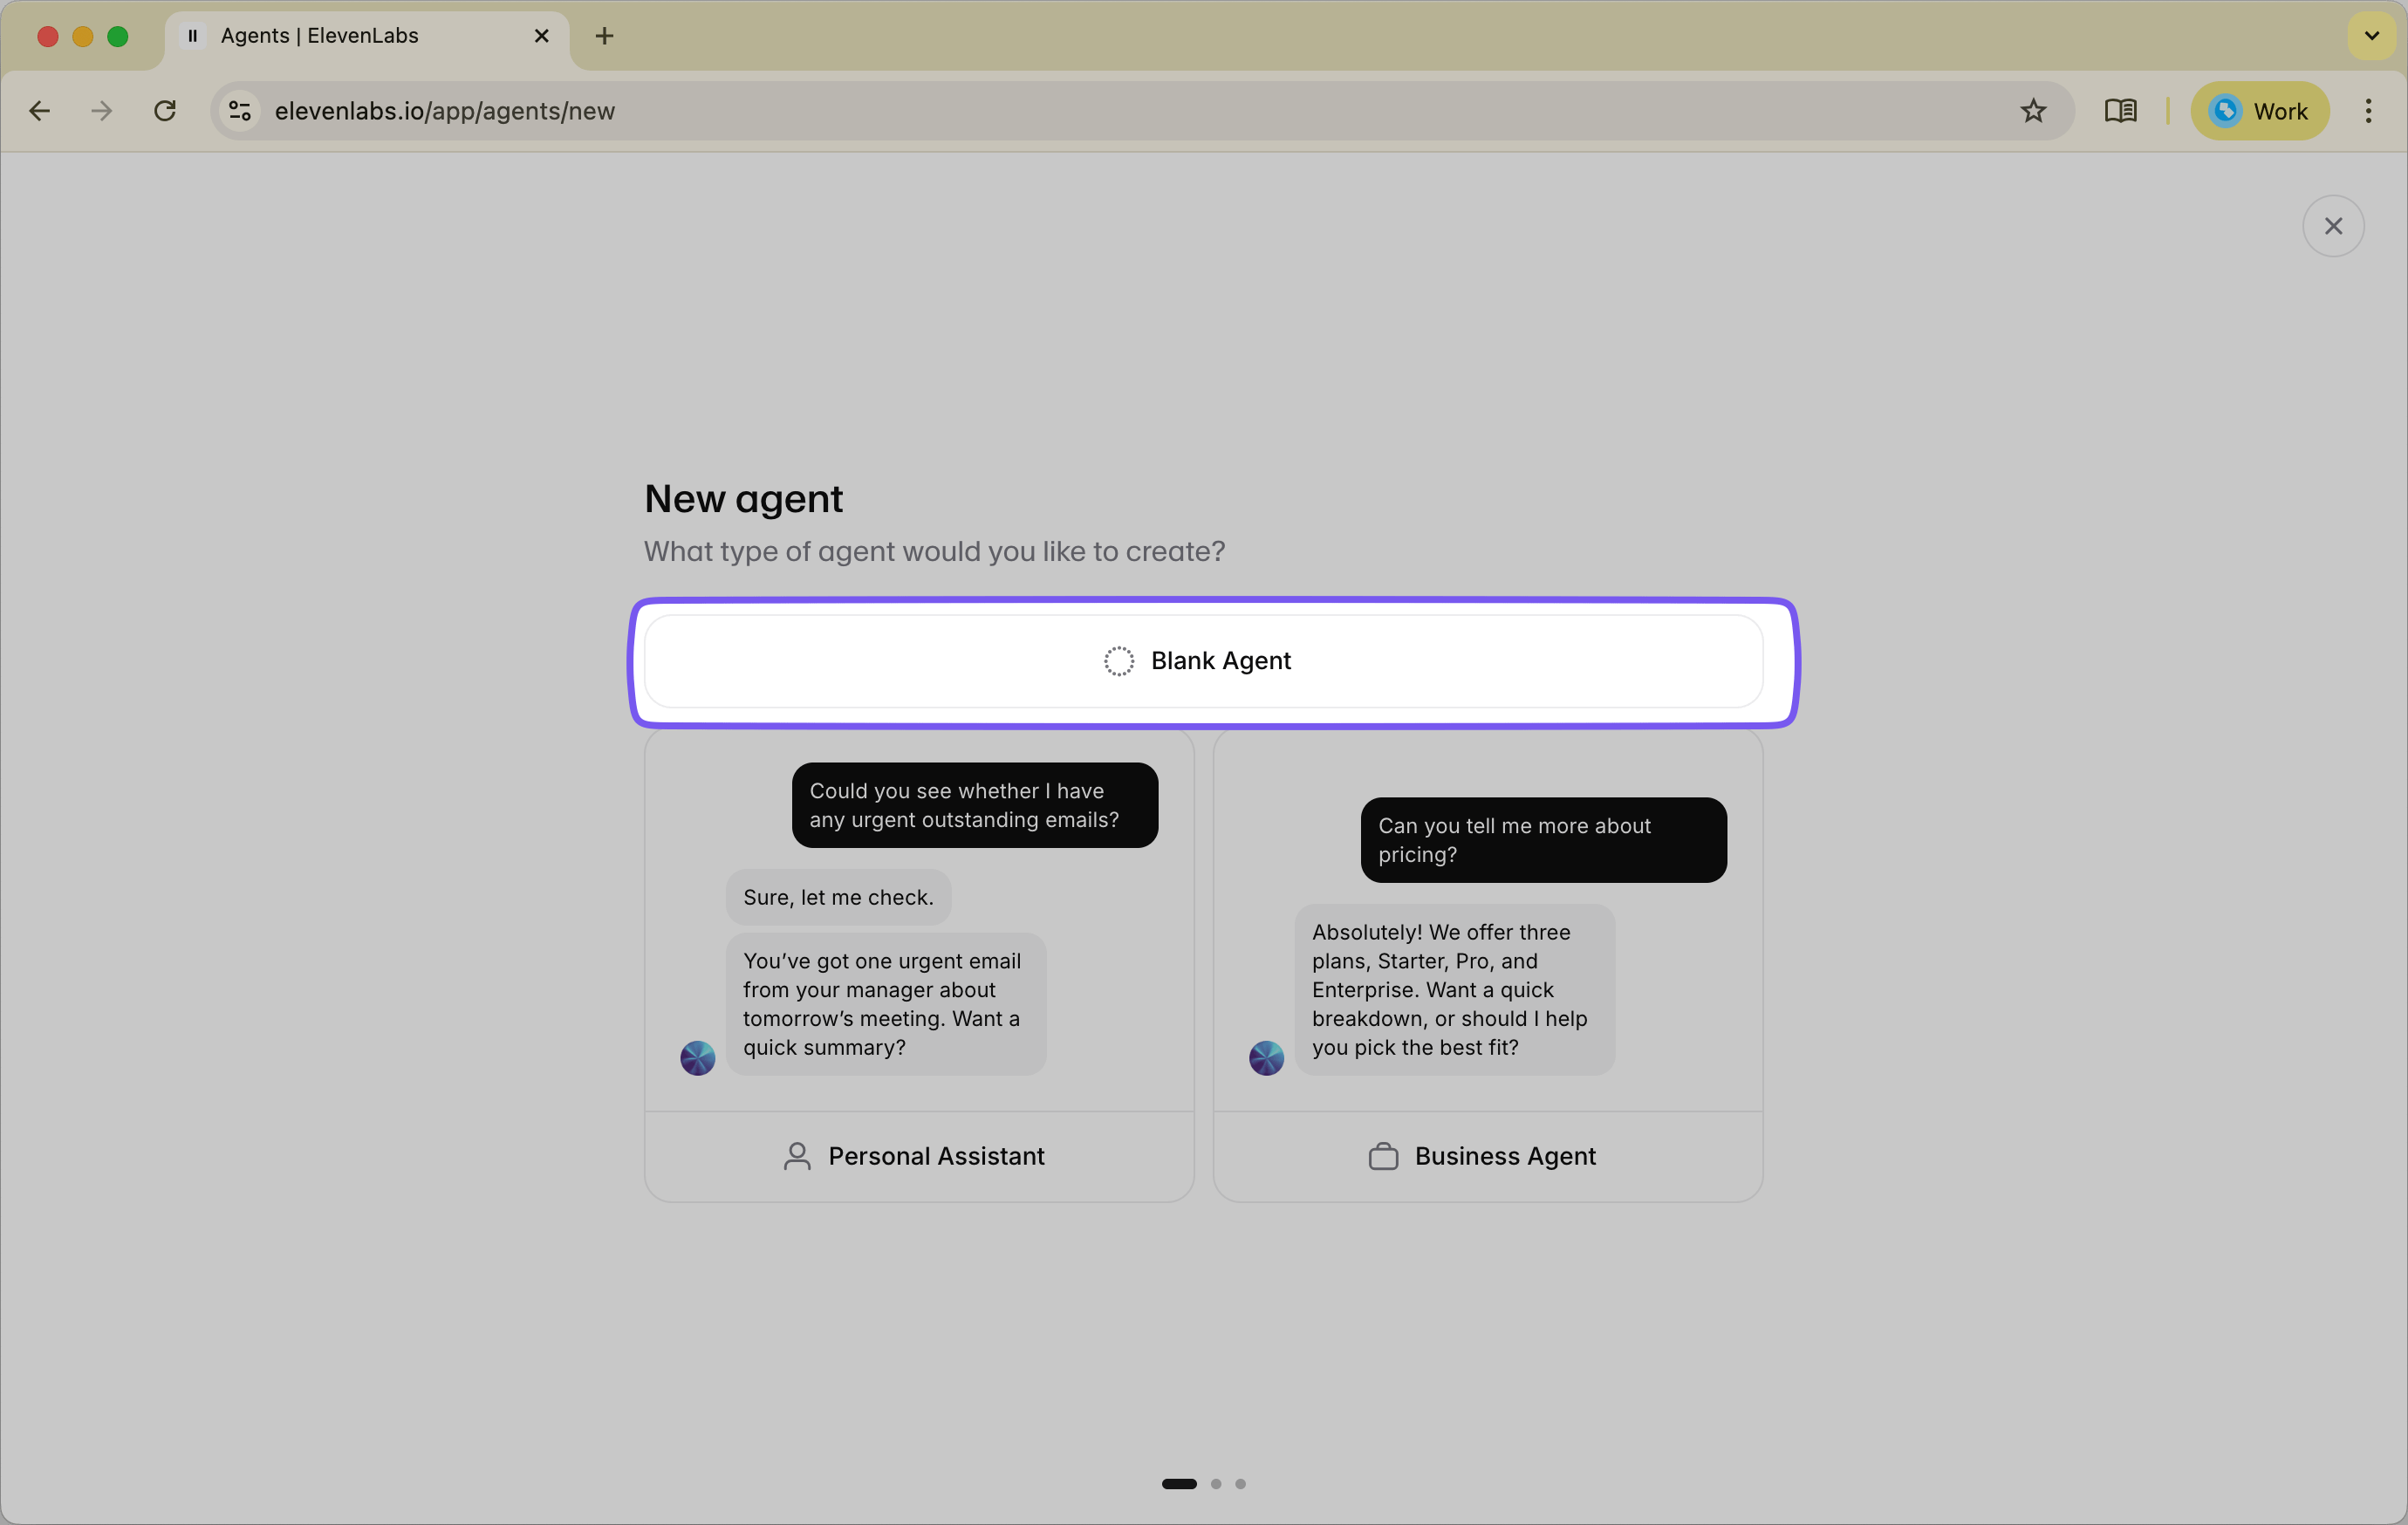
Start in the ElevenLabs Agents Platform and create a new Blank Agent.
For the agent instructions, use the MCP-oriented prompt from the repository's SYSTEM_PROMPT.md.
The prompt frames the agent as a web-browsing assistant that works against the current page state and takes actions through MCP. In practice, it tells the model to:
- inspect the current page before acting
- rely on the latest page state
- prefer
wf-idwhen available - ask for clarification when needed
- avoid exposing internal mechanics to the user
- route tool usage through MCP using the active session context
One detail is especially important: the prompt explicitly references {{session__id}}. That variable is what connects the agent's MCP tool calls to the correct live Webfuse session.
Step 2: Enable MCP Tools in ElevenLabs
In the agent configuration, enable MCP tools for the agent.
This is the defining difference in the MCP path. You are not creating a custom list of client tools and wiring each one through extension code. Instead, ElevenLabs talks through MCP, and Webfuse handles the execution inside the browser session.
Use the same sequence shown in the walkthrough for enabling MCP and confirming the agent's tool settings.
Set Tool Approval Mode to No Approval so the agent can execute the MCP tool calls smoothly during the session.
Step 3: Configure MCP Dynamic Variables
This integration depends on two dynamic values:
session__id- used to route MCP actions to the correct Webfuse sessionspace__rest_key- used for MCP authentication
These are configured in two different places:
session__idis passed from the extension into the widget at runtime.space__rest_keyshould be configured in ElevenLabs as a dynamic variable default value for the agent.
For space__rest_key, use your Webfuse Space REST API key so ElevenLabs can authenticate MCP requests against the Space.
Step 4: Build the MCP Extension
Clone the MCP extension repo:
git clone git@github.com:webfuse-com/extension-elevenlabs-mcp.git
This extension is lightweight because the tool layer lives in MCP. The extension's job is simply to open the ElevenLabs widget inside the Webfuse session and pass along the session information the agent needs.
The main files are:
manifest.jsonbackground.jspopup.htmlpopup.js
The manifest file
Use the manifest from the repo and replace the AGENT_KEY value with your ElevenLabs agent ID:
{
  "manifest_version": 3,
  "version": "1.0",
  "name": "ElevenLabs MCP Agent",
  "host_permissions": [
    "https://*.elevenlabs.io/*",
    "ws://*.elevenlabs.io/*"
  ],
  "background": {
    "service_worker": "background.js"
  },
  "action": {
    "default_popup": "popup.html"
  },
  "content_scripts": [
    {
      "js": ["content.js"],
      "matches": ["<all_urls>"]
    }
  ],
  "env": [
    {
      "key": "AGENT_KEY",
      "value": "agent_0123abcdefghijklomnopqrstuvw"
    }
  ]
}
AGENT_KEY is the main value you need to replace here. It tells the widget which ElevenLabs agent to load when the popup opens.
The popup container
popup.html is a minimal container. It loads the ElevenLabs widget script and the popup logic:
<!DOCTYPE html>
<html lang="en">
  <head>
    <meta charset="utf-8">
    <meta name="viewport" content="width=device-width, initial-scale=1.0">
    <title>ElevenLabs Voice Agent</title>
    <script src="https://unpkg.com/@elevenlabs/convai-widget-embed" async type="text/javascript"></script>
    <script src="./popup.js"></script>
  </head>
  <body>
    <!-- WIDGET -->
  </body>
</html>
The popup logic
popup.js is the key file in the MCP flow. It fetches the active Webfuse session ID and injects it into the ElevenLabs widget as a dynamic variable:
async function init() {
  const dynamicVariables = {
    "session__id": (await browser.webfuseSession.getSessionInfo()).sessionId
  };

  const el = document.createElement("elevenlabs-convai");
  el.setAttribute("agent-id", browser.webfuseSession.env.AGENT_KEY);
  el.setAttribute("dynamic-variables", JSON.stringify(dynamicVariables));
  document.body.appendChild(el);
}

document.addEventListener("DOMContentLoaded", init);
This is the critical handoff in the MCP flow: once session__id is attached to the widget, ElevenLabs can route MCP tool calls into the correct live Webfuse session.
The popup window behavior
background.js controls the popup window behavior so the widget opens in a ready-to-use floating panel inside the session:
browser.browserAction
  .setPopupStyles({
    backgroundColor: "#FFFFFF40",
    borderRadius: "20px",
  });
browser.browserAction.resizePopup(420, 620);
browser.browserAction.setPopupPosition({ bottom: "30px", right: "30px" });
browser.browserAction.detachPopup();
browser.browserAction.openPopup();
Step 5: Deploy the MCP Extension in Webfuse
With the agent configured and the extension ready, the next step is to install it into a Webfuse SPACE.
In Webfuse Studio:
- Create a SOLO SPACE.
- Make sure the Space is configured for browser automation.
- Open the Session Editor.
- Upload the
extension-elevenlabs-mcpfolder as an extension. - Confirm the extension uses the correct
AGENT_KEYvalue. - Make sure the Space REST API key you assigned to
space__rest_keyin ElevenLabs is the one for this Space.
Once installed, the extension will open the ElevenLabs widget in the session popup and pass the active session__id into it automatically. At that point, the session has everything it needs: the widget knows which agent to load, and MCP requests can be routed to the correct browser session.
Step 6: Launch and Test the MCP Flow
Now launch a session from the Space link and open a target site such as https://www.wikipedia.org.
Once the popup appears, start the agent and try a few direct prompts:
- "What is on this page?"
- "Find the search box and type artificial intelligence."
- "Click the search button."
- "Go to https://www.example.com."
As you test, the flow should feel straightforward:
- ElevenLabs interprets the request
- MCP tools are invoked against the active Webfuse session
- Webfuse executes the browser actions inside the live page
If those prompts work, you have a functioning MCP-based voice agent connected to a live website through Webfuse. Next, we will walk through the second implementation path: wiring ElevenLabs client tools directly through a Webfuse extension.
Part 2: Widget Integration
The second path uses the ElevenLabs widget with client tools that are wired directly through a Webfuse extension. Compared with the MCP approach, this setup is more explicit: you define the tools in ElevenLabs, implement them in the extension, and connect each tool call to the corresponding Webfuse browser action.
Step 1: Configuring the Agent in ElevenLabs
We will start the same way: create the agent in ElevenLabs, give it the right instructions, and define the tools it will be allowed to call.
1.1. Create a New Agent
First, log in to your ElevenLabs account and open the Agents Platform. Create a new agent and choose "Blank Agent" so you can fully control its instructions and tools.
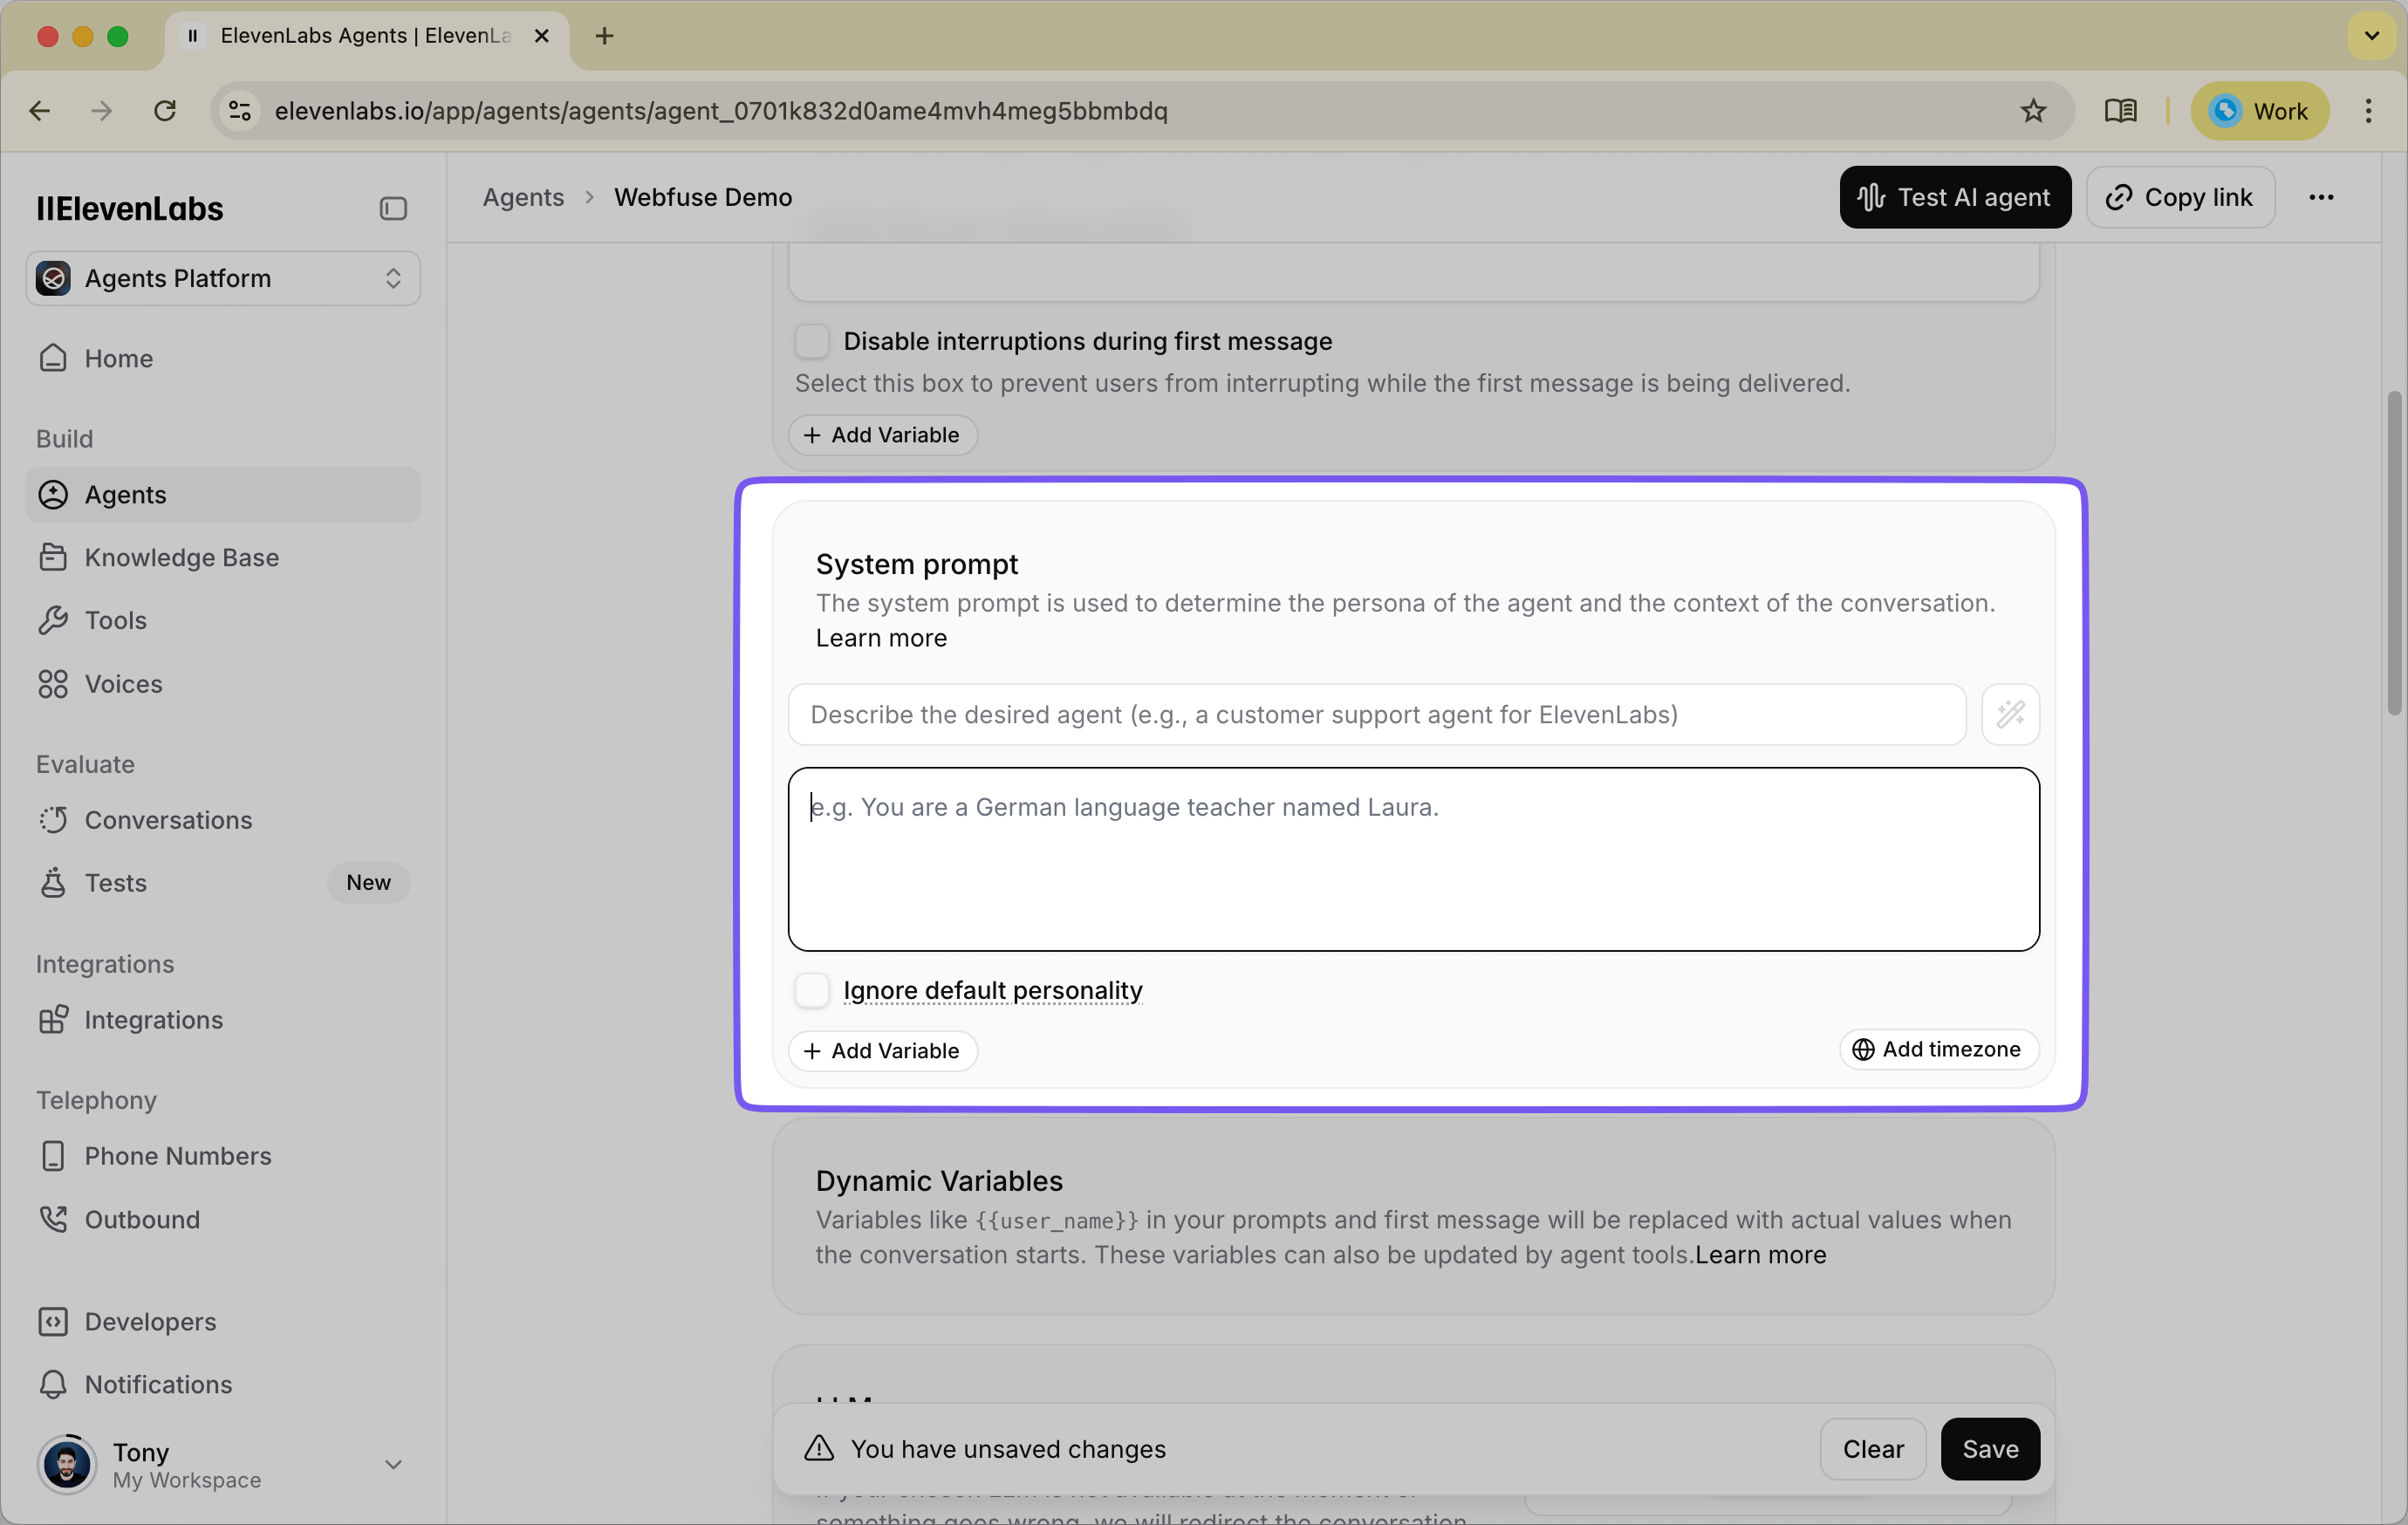
1.2. Set the System Prompt and Instructions
In the Instructions field, use the prompt from the repository's SYSTEM_PROMPT.md. It gives the agent a clear operating model for web interaction.
The prompt teaches the agent to behave like a web-browsing assistant that can:
- inspect the current page before acting
- rely on the latest DOM snapshot rather than assumptions
- prefer unique
wf-idattributes when available - ask for clarification when intent is ambiguous
- avoid mentioning DOM snapshots to the user
- follow clear safety guardrails around sensitive data and restricted actions
You can paste the full prompt directly from the repo, or adapt it for your workflow. If you customize it, keep the core principles intact: the current page is the source of truth, the agent should inspect before acting, and tool calls should target elements present in the most recent page state.
1.3. Define the Client-Side Tools
Next, scroll to the Tools section. These should be added as Client tools, because the actual implementation runs inside the Webfuse extension.
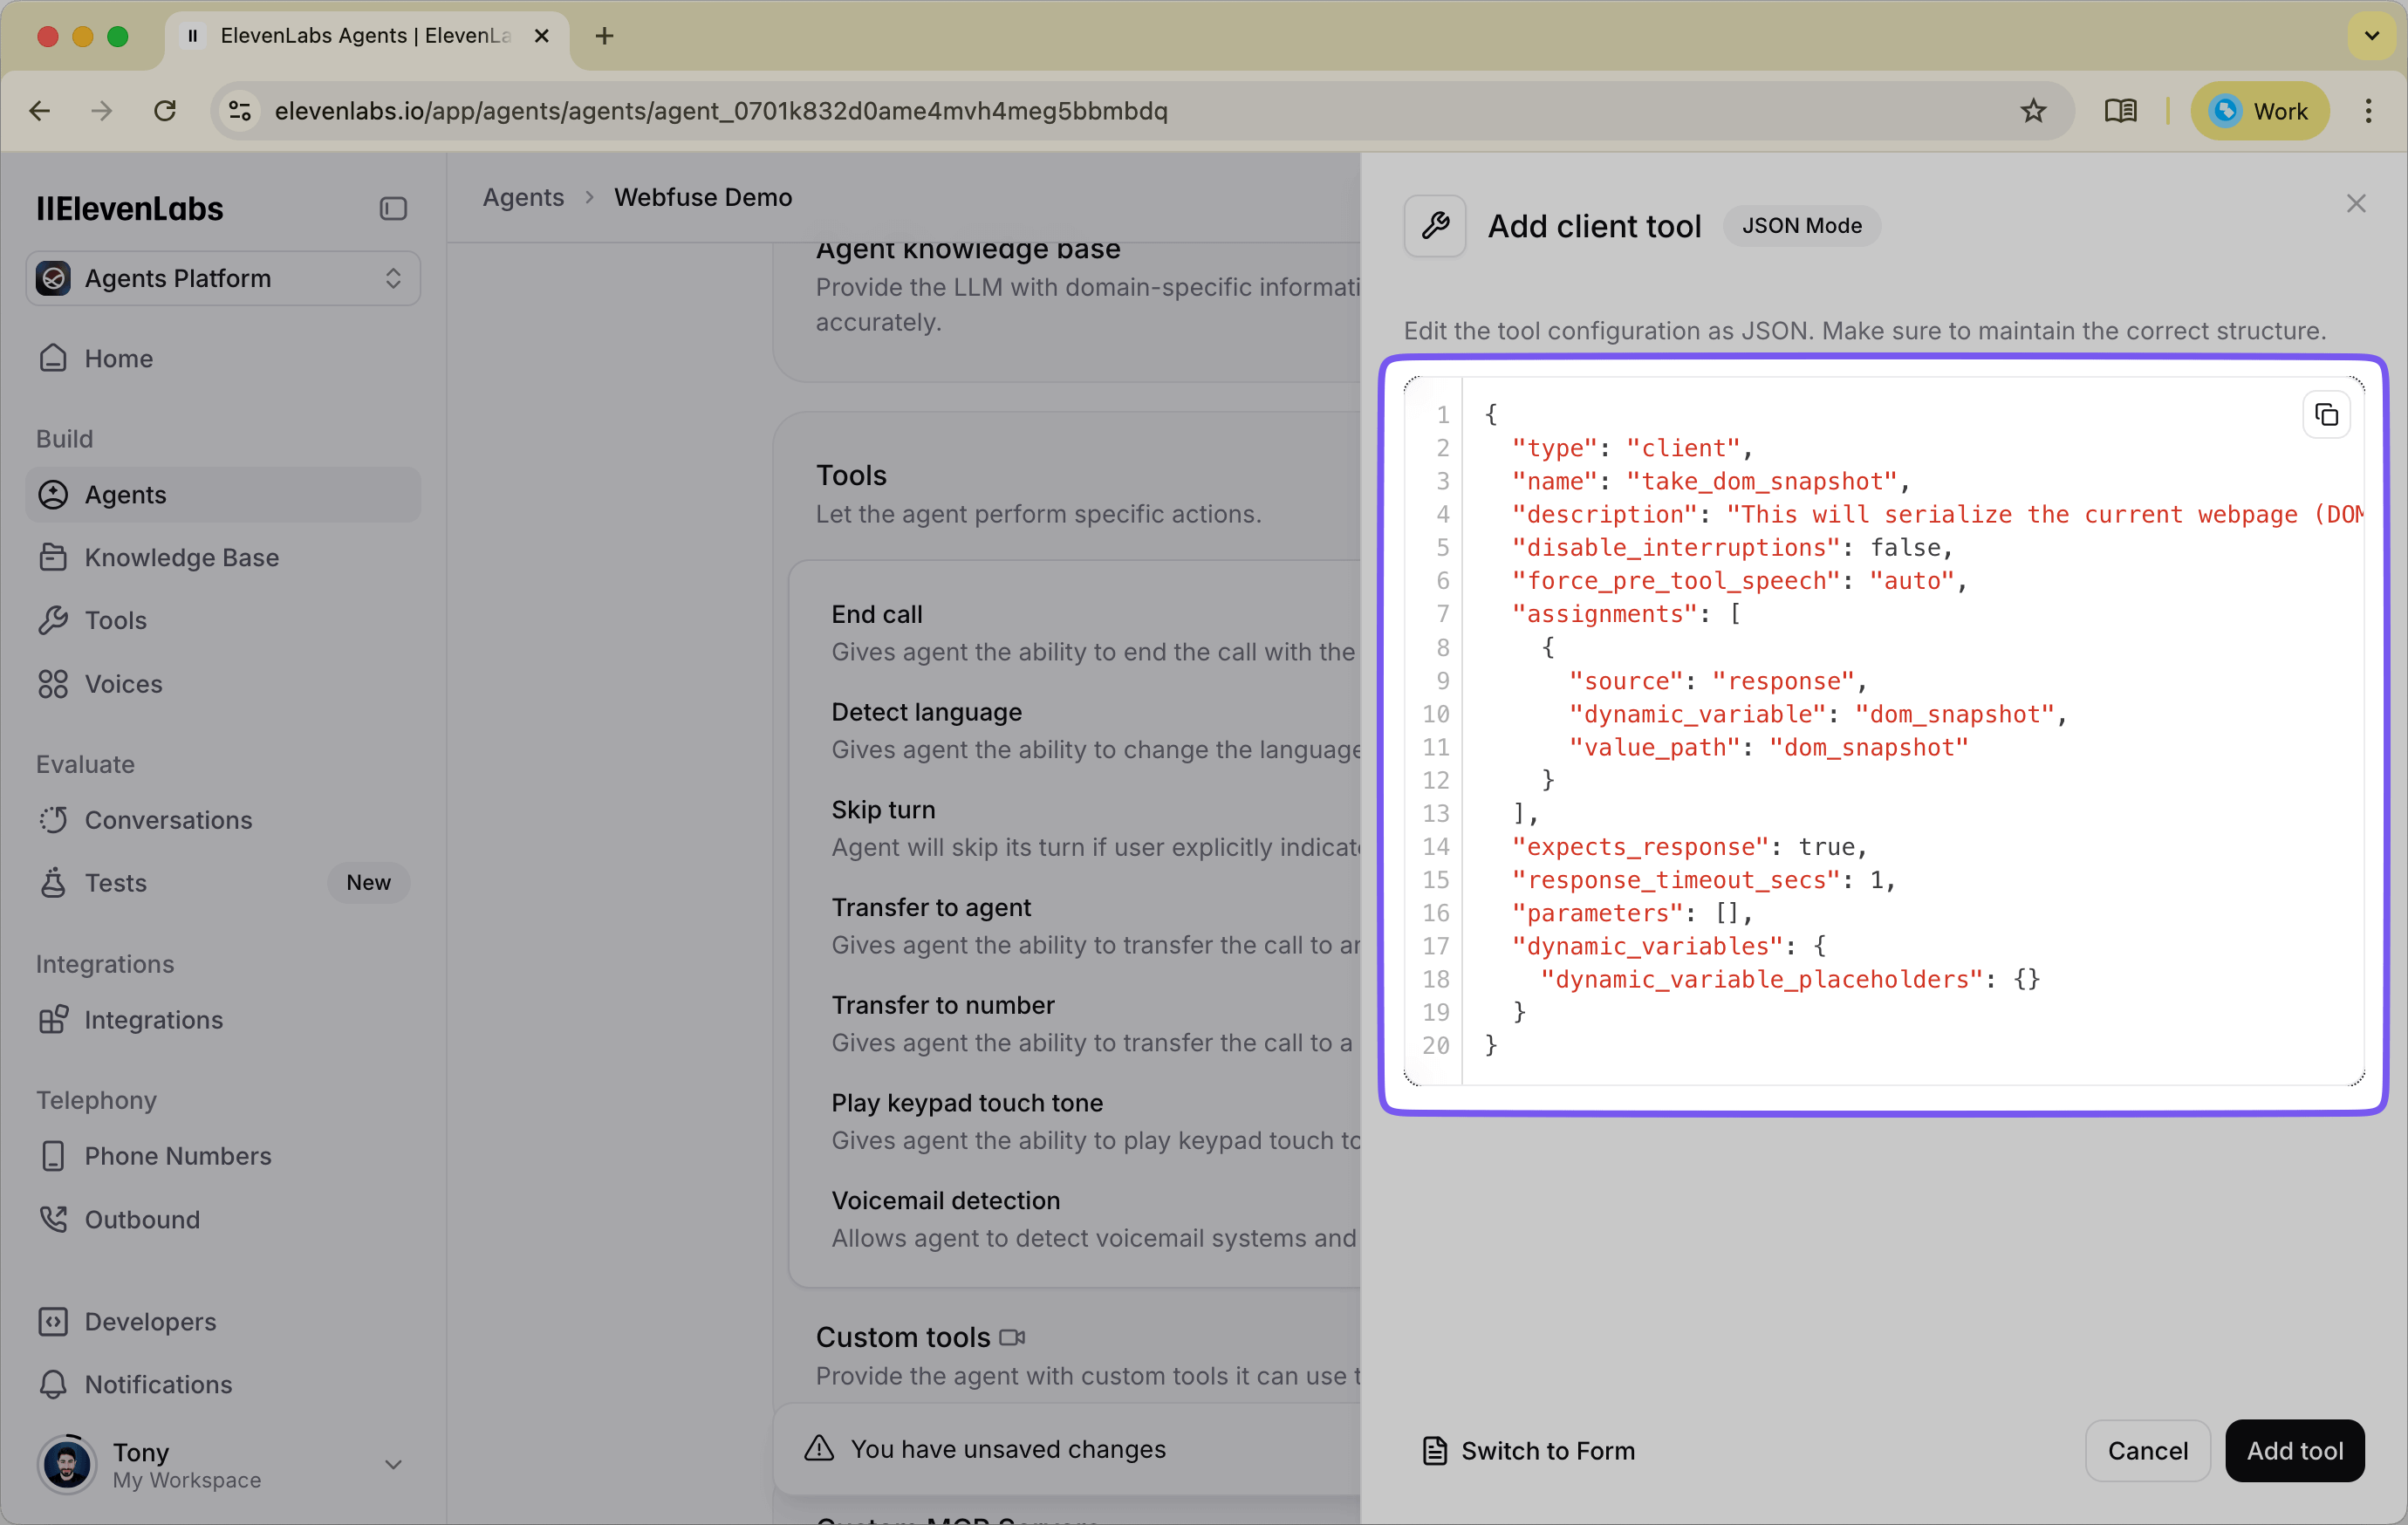
The repo now ships with ready-to-paste JSON files in elevenlabs_tools/. For each tool, click "Add Tool", choose "Client", open "JSON Editing", and paste the matching file contents.
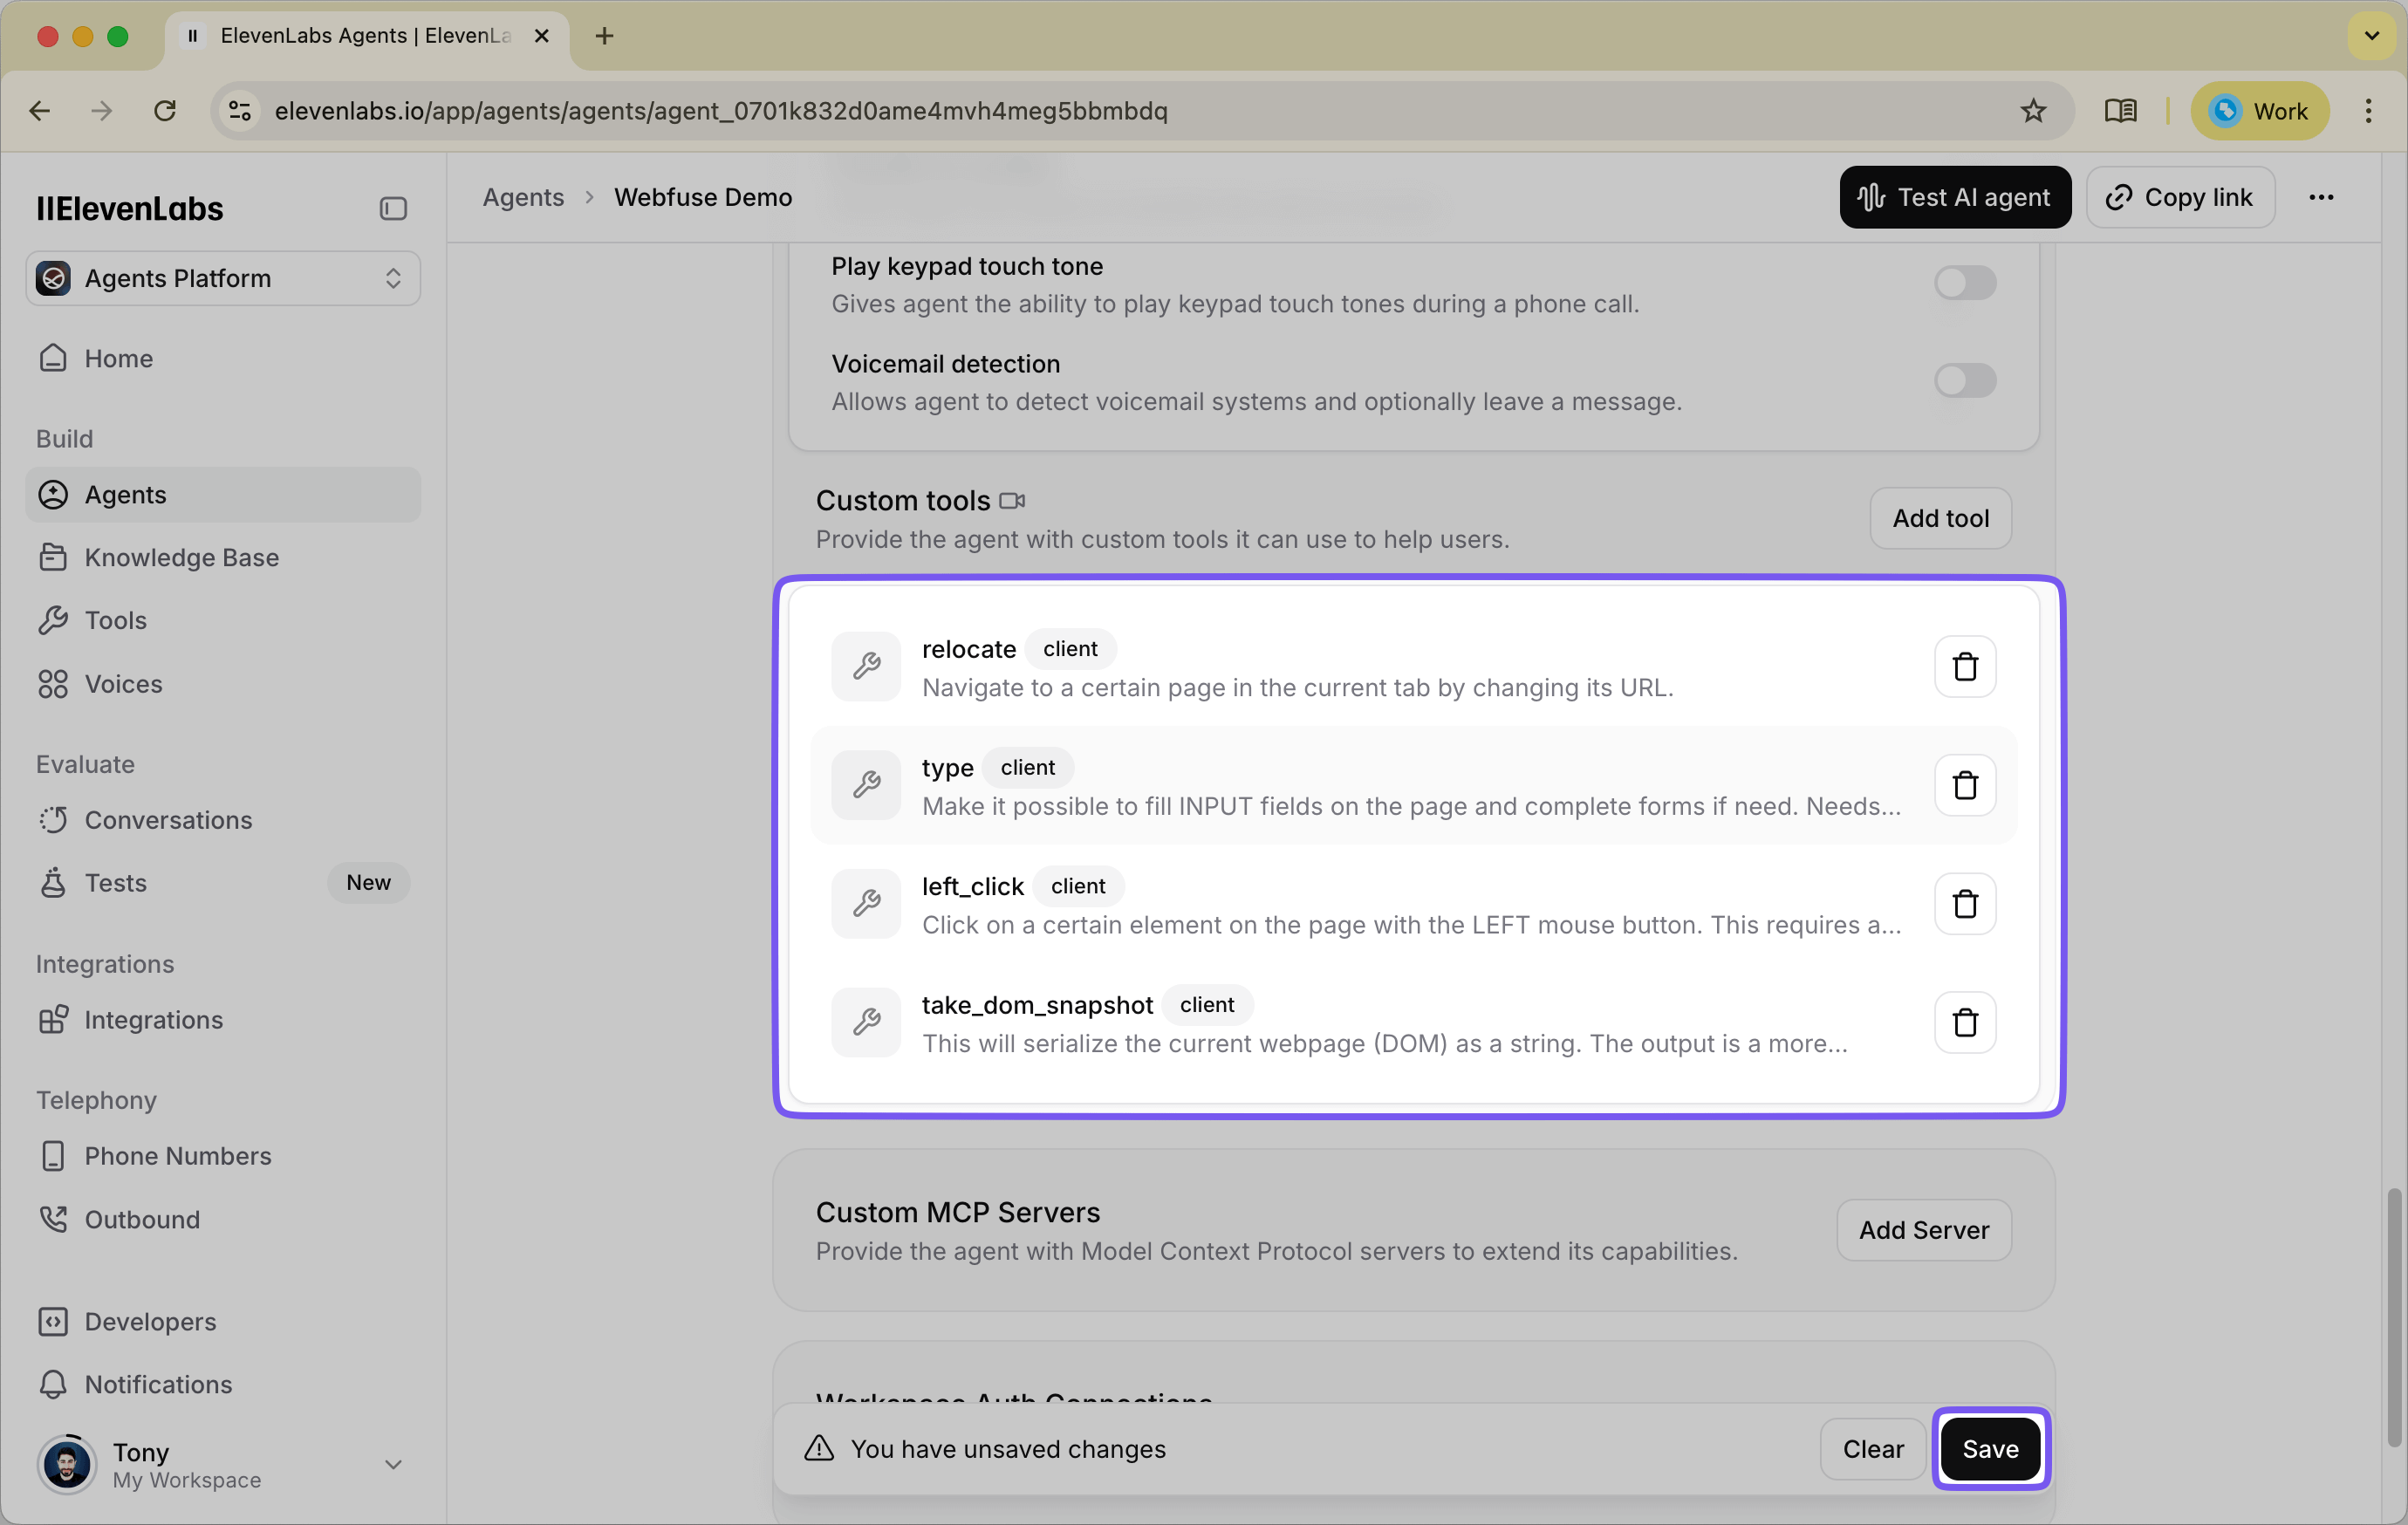
Create the following tools from the repo files:
take_dom_snapshot- inspect the page structuremouse_move- move the cursor to a target elementscroll- scroll the page or a target elementclick- click an elementtype- type text into an elementtext_select- highlight specific text inside an elementnavigate- navigate to a URLget_current_location- return the current page URL
Together, these tools give the agent a practical web-control toolkit: it can inspect the page, move through it, interact with elements, highlight content, navigate between pages, and confirm where it is.
Two details matter here:
- Tool names must match exactly between ElevenLabs and the extension code.
- Argument names must also match exactly. For example, several tools use
targetfor element targeting, and navigation usesurl.
If you use the JSON files from elevenlabs_tools/ as-is, you will stay in sync with the extension implementation.
1.4. Save the Agent
Once you have added the system prompt and all eight client tools, save the agent.
At this point, the agent understands what capabilities it has, but it still needs the Webfuse extension to execute those tool calls against a live website. In the next step, we will connect the ElevenLabs widget to Webfuse's automation APIs through the updated extension structure from the repo.
Step 2: Building the Webfuse Session Extension
With the ElevenLabs agent configured, the next step is to connect it to the live browser session. The Webfuse extension is the execution layer: it hosts the ElevenLabs widget, exposes the client tools, and forwards those tool calls to Webfuse's browser automation APIs.
The easiest way to follow along is to clone the reference repo and use its files directly:
git clone git@github.com:webfuse-com/extension-elevenlabs-widget.git
The extension consists of five key files:
manifest.jsonbackground.jspopup.htmlpopup.jscontent.js
Together, they create a simple but effective flow:
popup.htmlloads the ElevenLabs widget.popup.jscreates the widget instance and registers the client tools.- Those tools send messages into the active Webfuse session.
content.jsreceives the messages and calls the appropriate Webfuse automation methods.background.jscontrols the popup's appearance and behavior.
2.1. Create the Extension Folder
Create a local folder for the extension, or clone the full repo and use it as-is.
If you are creating the files manually, use the same structure as the repo:
extension-elevenlabs-widget/
├── manifest.json
├── background.js
├── content.js
├── popup.html
└── popup.js
2.2. Configure manifest.json
The manifest declares the popup, background worker, content script, permissions, and environment variables used by the extension.
Use this structure:
{
  "manifest_version": 3,
  "version": "1.0",
  "name": "ElevenLabs Widget Agent",
  "host_permissions": [
    "https://*.elevenlabs.io/*",
    "ws://*.elevenlabs.io/*"
  ],
  "background": {
    "service_worker": "background.js"
  },
  "action": {
    "default_popup": "popup.html"
  },
  "content_scripts": [
    {
      "js": ["content.js"],
      "matches": ["<all_urls>"]
    }
  ],
  "env": [
    {
      "key": "AGENT_KEY",
      "value": "agent_0123abcdefghijklomnopqrstuvw"
    }
  ]
}
Replace the AGENT_KEY value with your real ElevenLabs agent ID.
The important parts are:
background.service_workerloadsbackground.jsaction.default_popuppoints topopup.htmlcontent_scriptsinjectscontent.jsinto pages in the sessionenvstores the agent ID so the widget can boot with the correct ElevenLabs agent
2.3. Create popup.html
This file is the container for the ElevenLabs widget. It only needs to load the widget script and the popup logic.
<!DOCTYPE html>
<html lang="en">
  <head>
    <meta charset="utf-8">
    <meta name="viewport" content="width=device-width, initial-scale=1.0">
    <title>ElevenLabs Voice Agent</title>
    <script src="https://unpkg.com/@elevenlabs/convai-widget-embed" async type="text/javascript"></script>
    <script src="./popup.js"></script>
  </head>
  <body>
    <!-- WIDGET -->
  </body>
</html>
When the popup opens, popup.js will insert the elevenlabs-convai element into the page.
2.4. Create background.js
This file controls the popup window itself: styling, size, position, and auto-open behavior.
browser.browserAction
  .setPopupStyles({
    backgroundColor: "#FFFFFF40",
    borderRadius: "20px",
  });
browser.browserAction.resizePopup(420, 620);
browser.browserAction.setPopupPosition({ bottom: "30px", right: "30px" });
browser.browserAction.detachPopup();
browser.browserAction.openPopup();
This gives the widget a floating, ready-to-use popup inside the Webfuse session.
2.5. Create popup.js
This file is the main integration layer between ElevenLabs and Webfuse. It defines the client tools that ElevenLabs can call and maps each tool to a message sent into the browser session.
function defineTool(name, automationScope, automationMethod) {
  return {
    [name]: args => {
      return browser.tabs.sendMessage(0, {
        automationScope,
        automationMethod,
        args
      });
    }
  };
}

const CLIENT_TOOLS = {
  ...defineTool("take_dom_snapshot", "see", "domSnapshot"),
  ...defineTool("mouse_move", "act", "mouseMove"),
  ...defineTool("scroll", "act", "scroll"),
  ...defineTool("click", "act", "click"),
  ...defineTool("type", "act", "type"),
  ...defineTool("text_select", "act", "textSelect"),
  ...defineTool("navigate", null, "navigate"),
  ...defineTool("get_current_location", "custom", "getCurrentLocation"),
};

function init() {
  const el = document.createElement("elevenlabs-convai");
  el.setAttribute("agent-id", browser.webfuseSession.env.AGENT_KEY);
  document.body.appendChild(el);

  el.addEventListener("elevenlabs-convai:call", (event) => {
    event.detail.config.clientTools = CLIENT_TOOLS;
  });
}

document.addEventListener("DOMContentLoaded", init);
This file does three things:
- defines the tool names ElevenLabs can call
- maps each tool to a Webfuse-side automation method
- injects the tool map into the widget when a call starts
The most important rule is simple: the tool names in CLIENT_TOOLS must exactly match the tools you created in ElevenLabs.
2.6. Create content.js
content.js is the message bridge inside the live page. It receives tool calls from popup.js and dispatches them to the right Webfuse automation scope.
const CUSTOM_TOOLS = {
  getCurrentLocation() {
    return document.location.href;
  }
};

browser.runtime.onMessage
  .addListener(message => {
    let scope;
    if (message.automationScope === "custom") {
      scope = CUSTOM_TOOLS;
    } else {
      scope = message.automationScope
        ? browser.webfuseSession.automation[message.automationScope]
        : browser.webfuseSession.automation;
    }

    return scope[message.automationMethod](message.args);
  });
This is what lets the agent act on the real page. For example:
clickroutes into theactscopetake_dom_snapshotroutes into theseescopenavigatecalls the top-level automation methodget_current_locationis handled by a small custom helper
At this point, the extension is complete. You have a popup-based ElevenLabs widget connected to Webfuse's live automation layer, with the client tools wired all the way through to the browser session.
Step 3: Deploying and Testing Your Agent in Webfuse
With the ElevenLabs agent configured and the extension built, the final step is to bring everything together inside Webfuse. We will create a SPACE, upload the extension, launch a live session, and verify that the agent can inspect and control a real website.
3.1. Create a Webfuse SPACE
First, log into the Webfuse Studio. A SPACE is the container for your augmented browsing sessions.
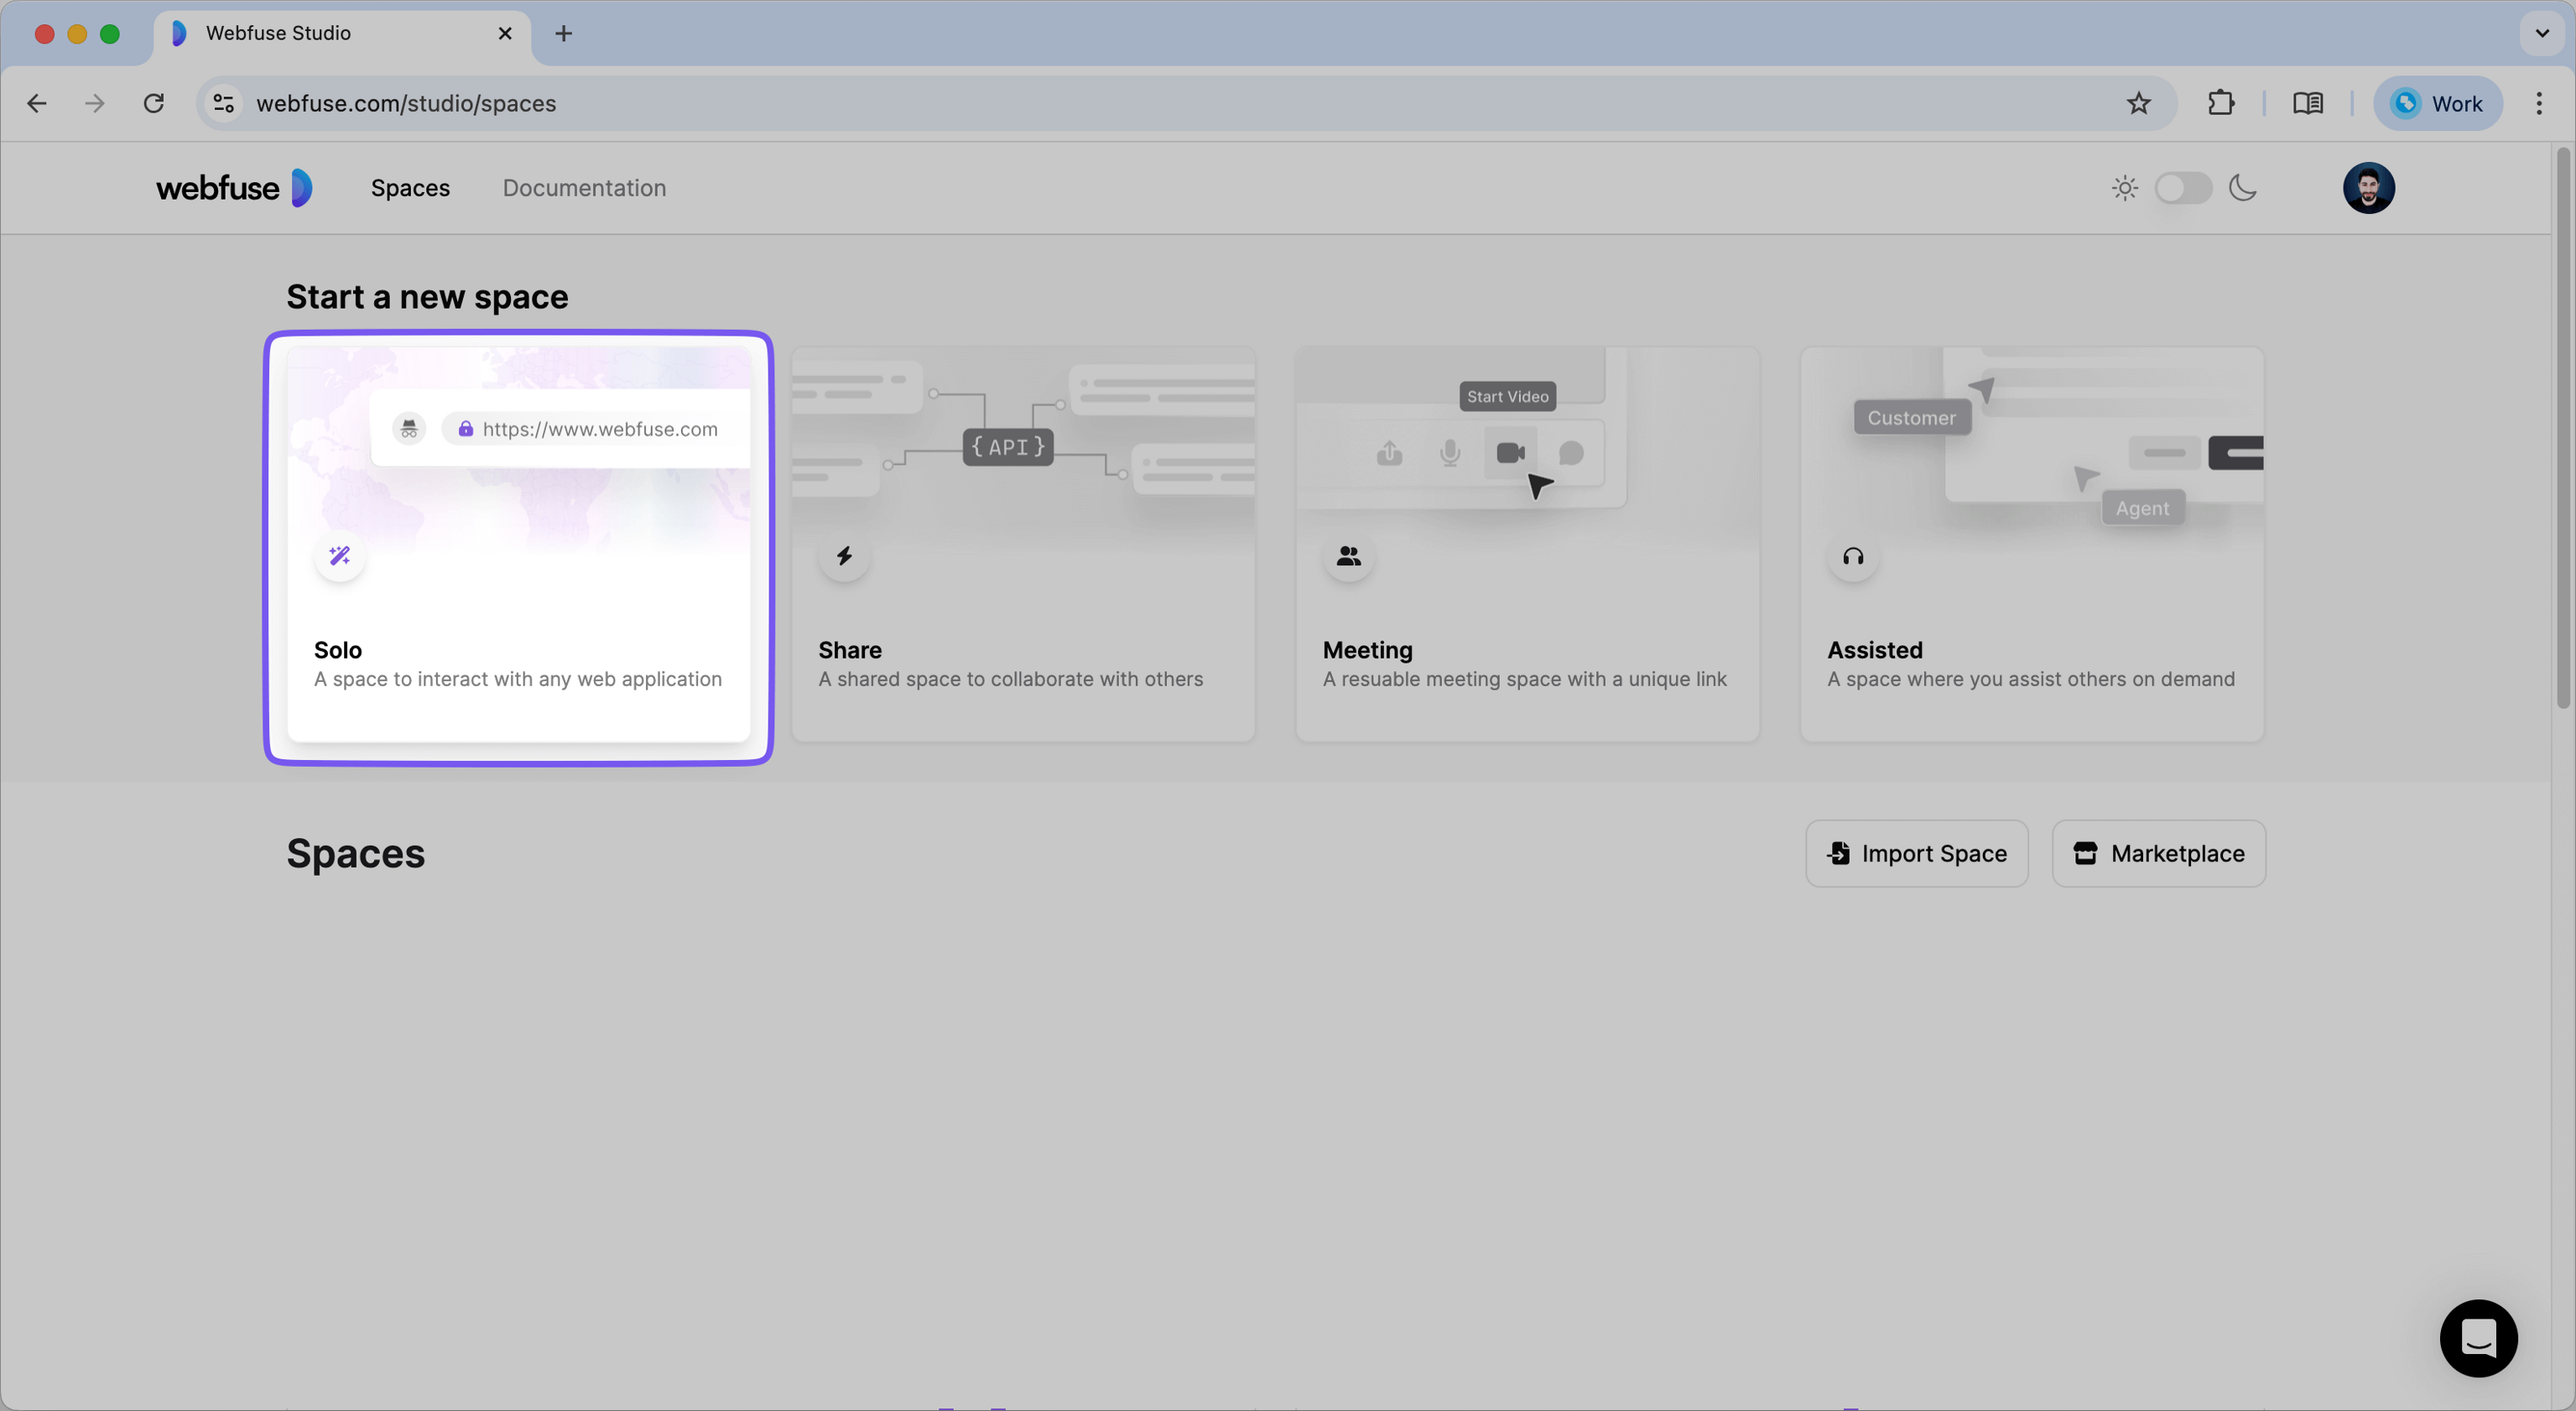
- From the main dashboard, create a new SOLO SPACE.
- Give your SPACE a clear name, such as "ElevenLabs Agent Demo."
- Configure the SPACE to open the website you want the agent to work on, or plan to navigate there once the session starts.
3.2. Upload the Session Extension
Now upload the extension into the SPACE so it loads automatically in every session.
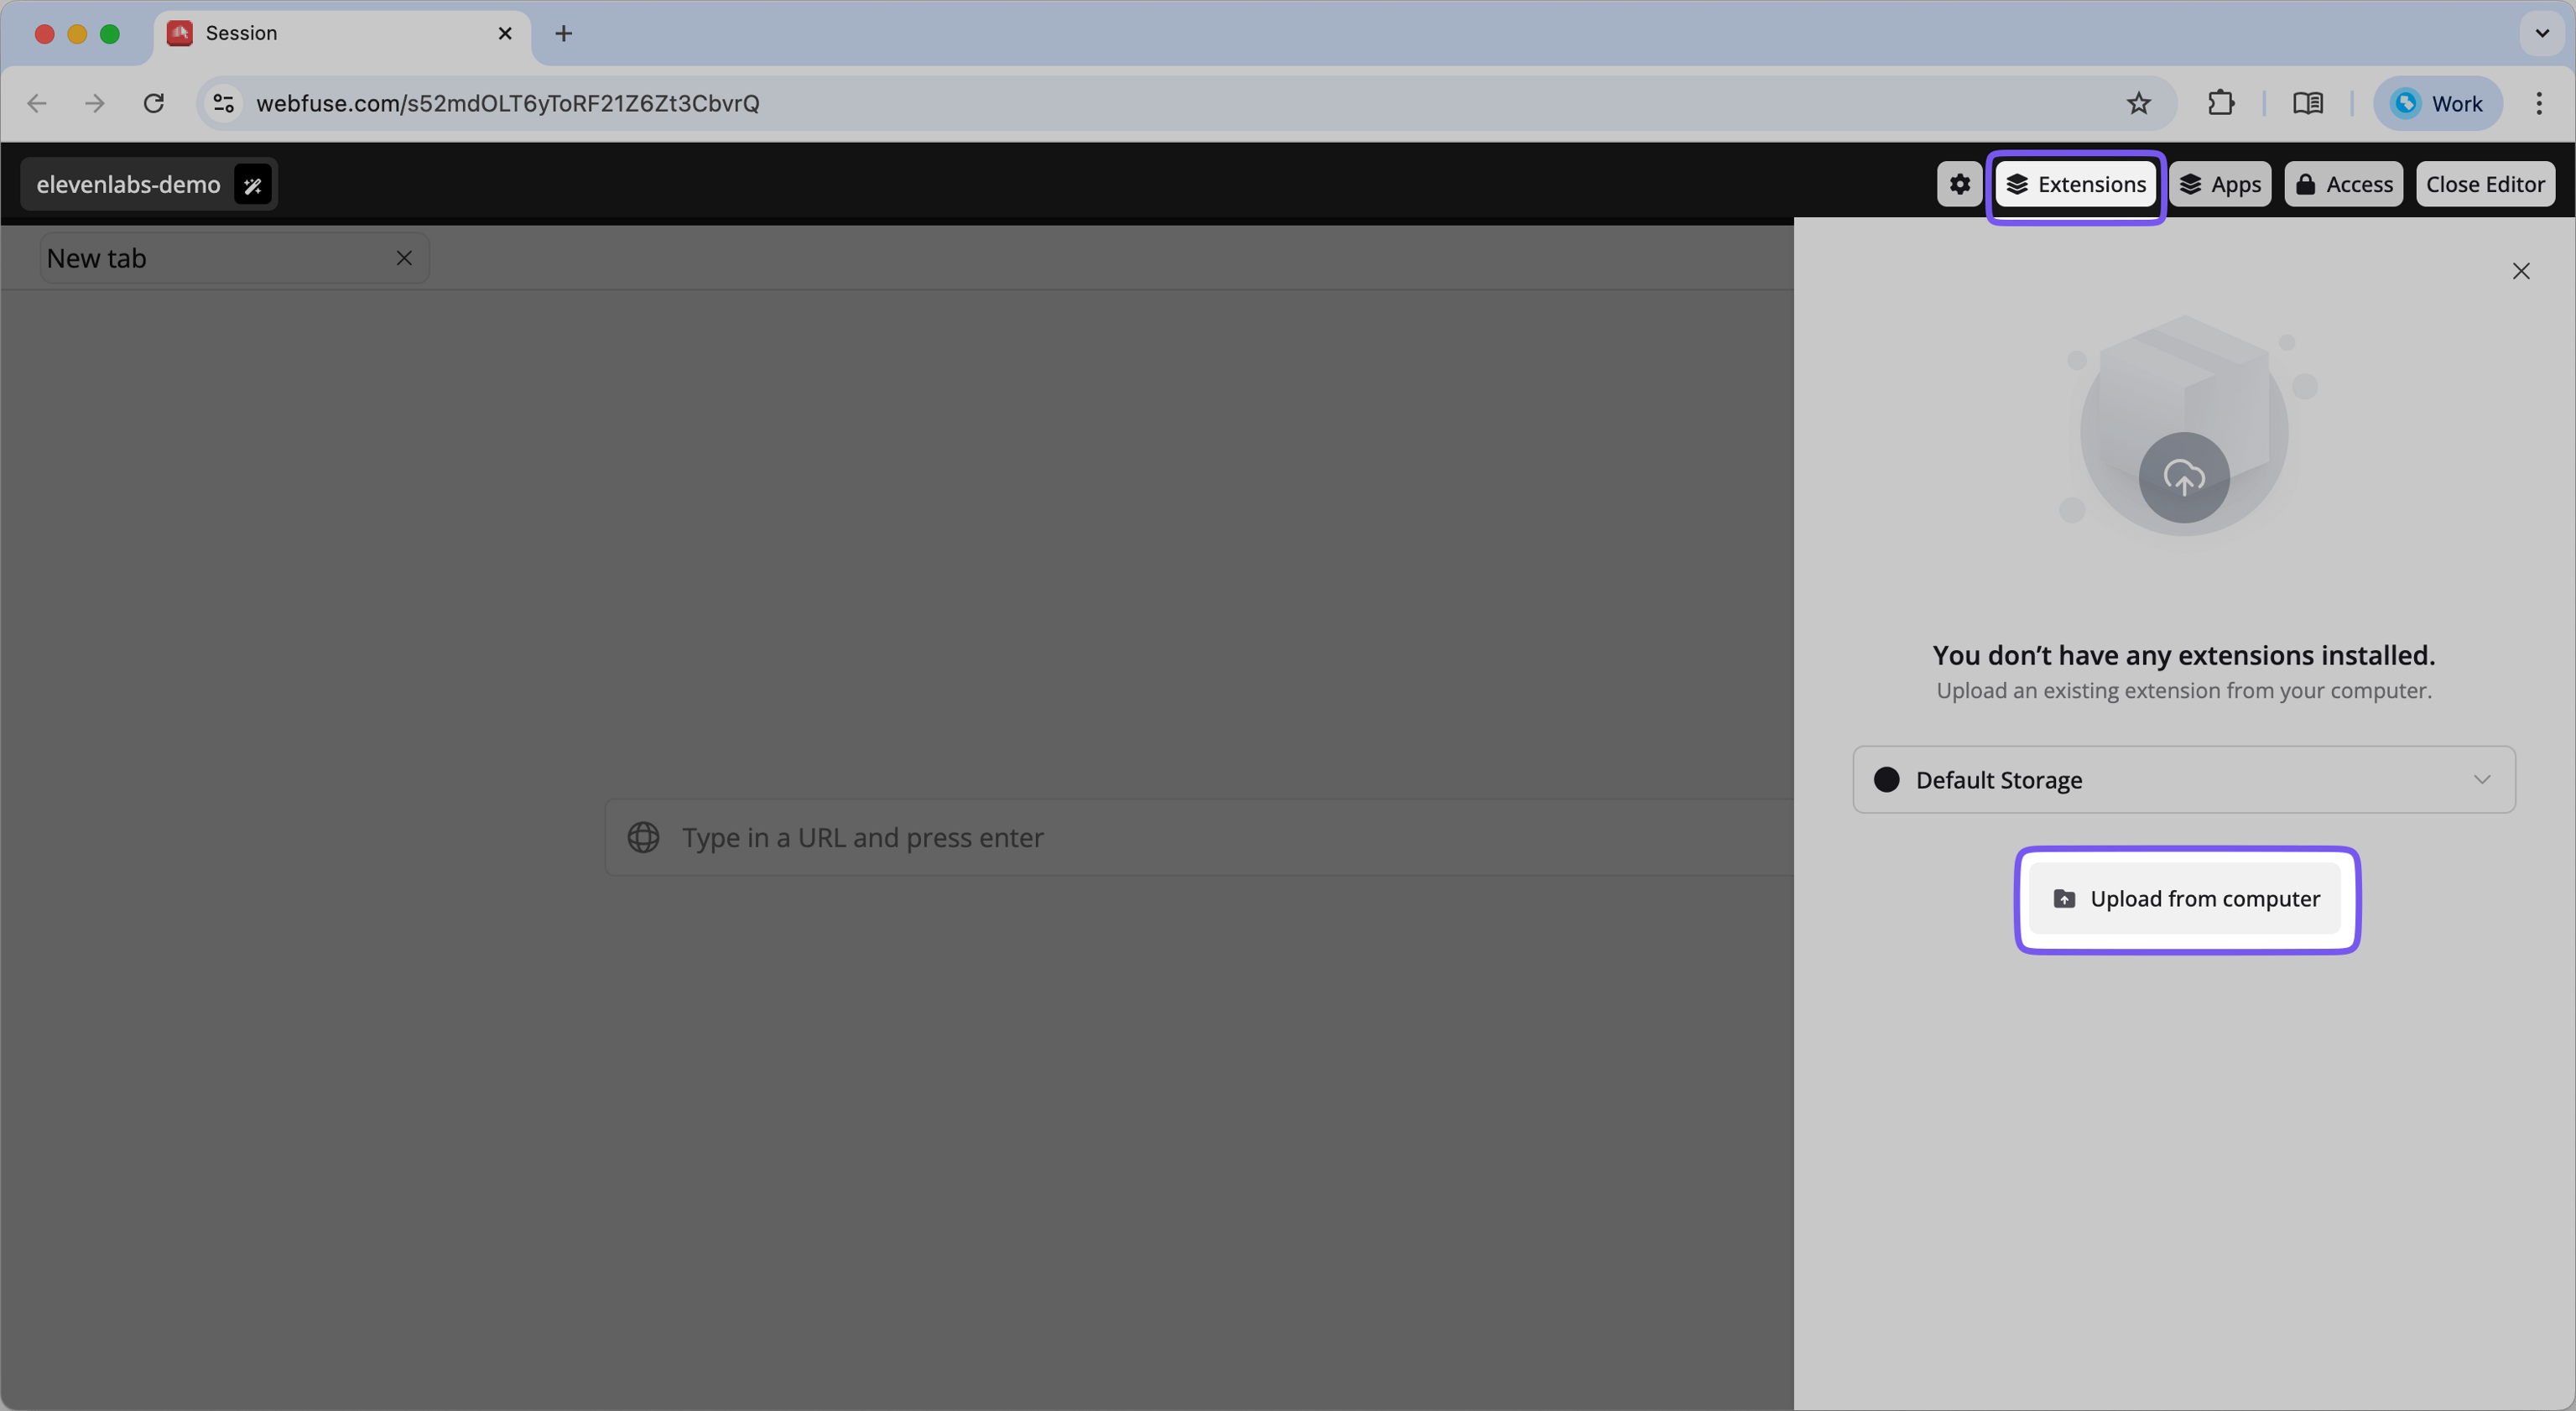
Note: You must temporarily use Google Chrome to upload extensions to Webfuse.
- Navigate to your newly created SPACE in the Webfuse Studio and open the Session Editor.
- In the editor, find and click on the "Extensions" tab.
- Click the "Upload Extension" button. You will be prompted to select a folder from your computer.
- Select the
extension-elevenlabs-widgetfolder from Step 2.
Webfuse will upload and install the extension into your SPACE. If your setup supports editing extension environment variables in Studio, confirm that AGENT_KEY points to the correct ElevenLabs agent.
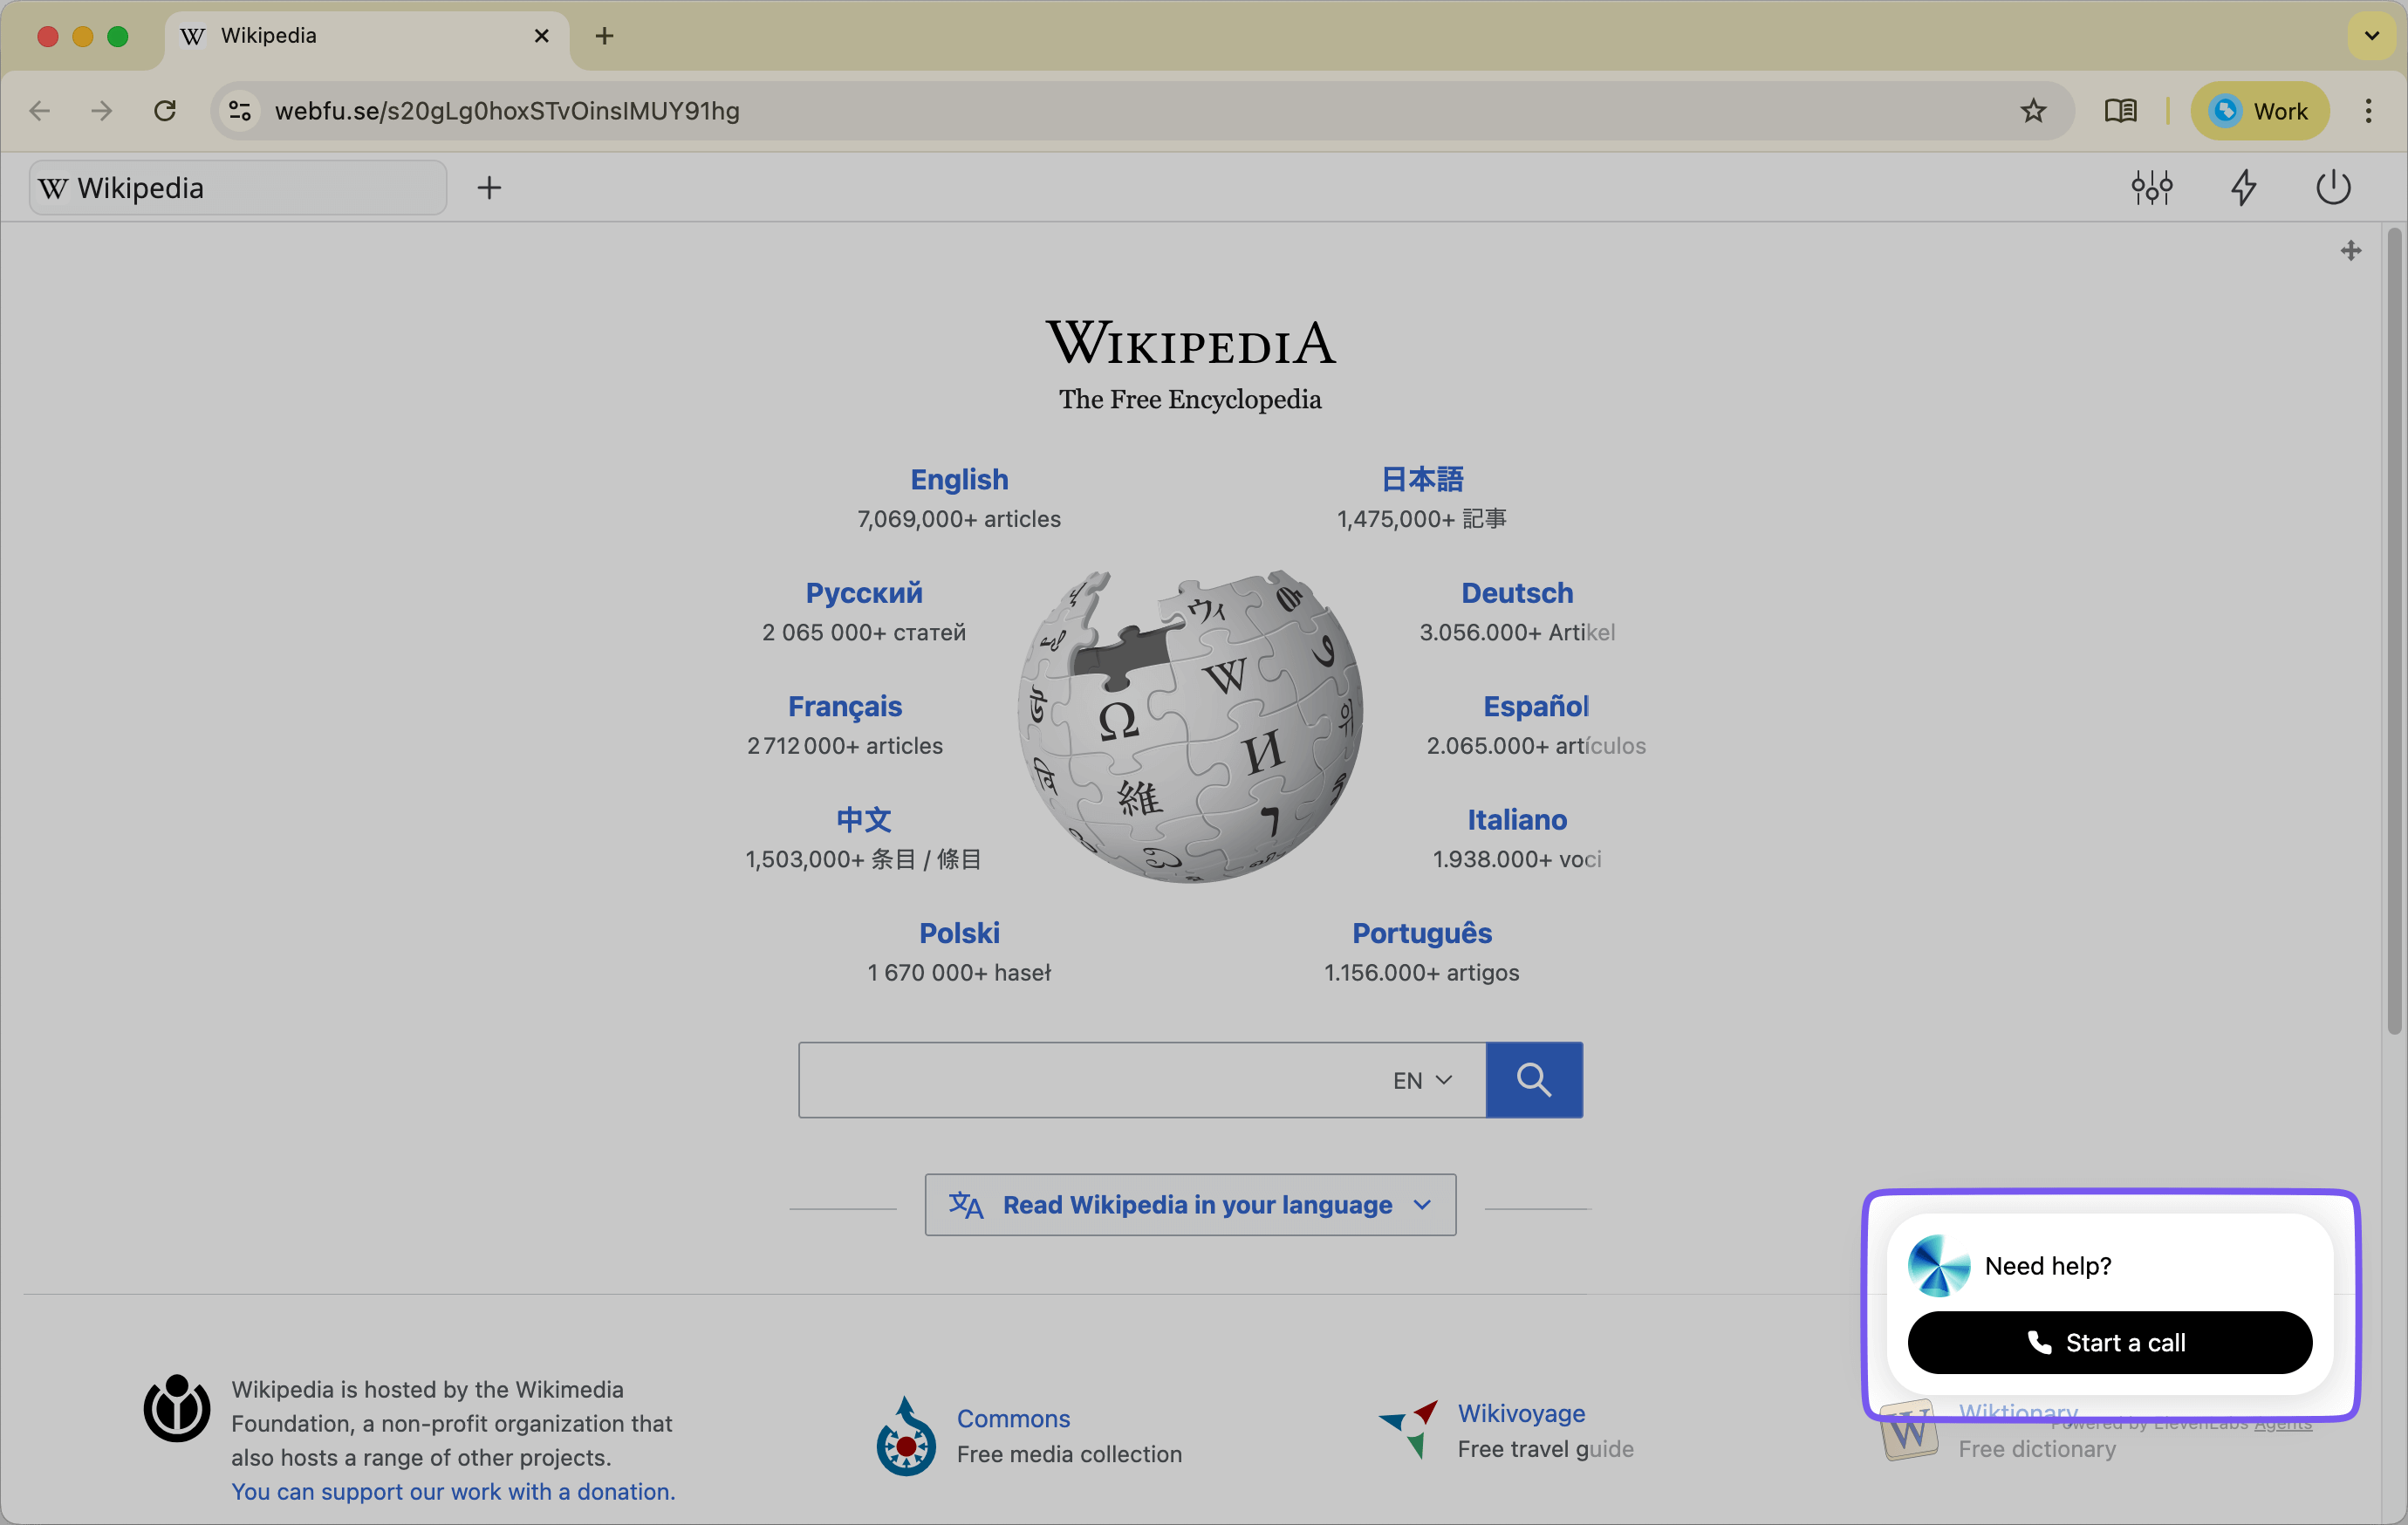
3.3. Launch a Session and Interact with Your Agent
The setup is complete. It is time to test the full voice-agent loop.
- Get the SPACE Link: In the main view for your SPACE, you will find its unique SPACE LINK. This is the public URL that launches a session. Copy this link.
- Start the Session: Open a new browser tab and paste the SPACE LINK. This will launch a Virtual Web Session.
- Open a Target Website: If your SPACE does not already open the target site, navigate to one now. A simple site such as
https://www.wikipedia.orgworks well for testing. - Wait for the Popup: After the session loads, the extension popup should appear automatically.
- Activate the Agent: Click the microphone button on the ElevenLabs widget to begin a conversation.
3.4. Test the Agent's Capabilities
Now give the agent a few direct tasks that exercise different tools.
- Test page understanding
- Say: "What is on this page?"
- What to expect: The agent should inspect the page with
take_dom_snapshotand give you a grounded summary of the content in front of it.
- Test typing into a page
- Say: "Find the search box and type 'artificial intelligence'."
- What to expect: The agent should inspect the page, identify the correct target element, and call
type. You should see the text appear in the search field.
- Test clicking
- Say: "Click the search button."
- What to expect: The agent should locate the correct target and call
click, causing the page to move to the next state.
- Test navigation
- Say: "Go to https://www.example.com."
- What to expect: The agent should call
navigateand load the requested URL.
- Test page awareness
- Say: "What page am I on right now?"
- What to expect: The agent can use
get_current_locationto confirm the current URL.
- Optional interaction tests
- Try commands like "Scroll down a bit", "Move to the main heading", or "Highlight the text about artificial intelligence".
- These can exercise
scroll,mouse_move, andtext_select.
Congratulations! You have successfully built and deployed a voice agent that can perceive and control a third-party website. It operates directly within the user's live session, providing a seamless and interactive experience. From here, you can expand its capabilities by adding new tools, refining its system prompt, or integrating it into more complex workflows. This prototype serves as a powerful foundation for the future of AI-driven web assistance.
Next Steps: From Prototype to a Polished Assistant
You have successfully built a functional prototype, but this is just the beginning. The architecture you've put in place is highly extensible, allowing you to create far more sophisticated and specialized agents. Here are several ways you can build upon this foundation to create a more robust and polished assistant.
4.1. Refine the System Prompt for Greater Intelligence
The agent's system prompt is its guiding constitution. The more detailed and clear its instructions, the more reliably it will perform.
- Add "Guardrails": Explicitly tell the agent what it should not do. For example, add instructions like, "Do not provide financial advice," or "Do not ask for sensitive personal information like passwords or social security numbers." This is critical for building a safe and trustworthy user experience.
- Provide Task-Specific Examples: If you are designing an agent for a specific workflow (e.g., filling out a life insurance application), you can provide examples within the prompt. Describe the steps and the kind of information it needs to look for on the page. For instance: "When filling out the birthdate, look for separate fields for month, day, and year."
- Improve its Personality: Define a clear personality for the agent. Is it a "polite and professional assistant"? Or a "friendly and encouraging guide"? Adding a "Personality" or "Tone" section to the prompt will make its responses more consistent and engaging.
4.2. Expand the Toolset for More Complex Tasks
Once you have one of these integrations working, you can extend it further. If you are building on the widget path, add new tools to CLIENT_TOOLS in popup.js and define them in ElevenLabs. If you are building on the MCP path, expand the actions and workflows you expose through MCP.
- A Data Extraction Tool: Create a
getDataFromSelectortool that extracts theinnerTextof an element. The agent could then use this to read information back to the user, such as an order number or account balance. - A Multi-Step Action Tool: For a common workflow, you could combine several actions into a single tool. For example, a
logintool could take a username and password, find the respective fields, type the information, and click the submit button, all in one call. - A Conditional Logic Tool: Create a tool that checks for the existence of an element on the page, like
doesElementExist(selector). The agent could use this to verify if it's on the correct page before proceeding with an action.
4.3. Customize the Agent's Appearance and Behavior
Both approaches give you control over how the agent appears and behaves inside the session.
- Style the Popup: The
popup.htmlcontainer can be extended to better match your brand, and popup behavior can be tuned through the extension scripts. - Programmatically Control the Popup: The Webfuse Extension API includes methods to control the popup window itself. In
background.js, you can adjust commands likebrowser.browserAction.resizePopup(width, height),browser.browserAction.setPopupPosition(...), orbrowser.browserAction.detachPopup()to refine the on-screen experience.
By refining the prompt, expanding the action layer, and tuning the session experience, you can turn either implementation path into a more polished assistant tailored to your workflow.
Conclusion: You've Built an Interactive Co-Pilot
By following this guide, you now have two practical ways to connect ElevenLabs to Webfuse and build a session-aware voice agent that can inspect a live website, understand a user's request, and take action inside the browser in real time.
At a high level, both approaches rely on the same core pieces:
- The ElevenLabs agent handles conversation, intent understanding, and tool selection.
- The Webfuse integration layer connects the agent to the live browser session, either through MCP or through extension-defined client tools.
- The Webfuse session provides the live, sandboxed browser environment where those actions run.
The choice between the two paths depends on how you want to structure the integration. The MCP path gives you a cleaner protocol-driven tool layer, while the widget path gives you explicit control over every client tool and browser action mapping.
Whichever path you choose, you now have a working foundation for a voice-driven web assistant that can be adapted to specific websites, workflows, and business use cases.
For more strategies on deploying voice agents across different industries and use cases, explore our Universal Voice Agent Deployment guide.
Frequently Asked Questions

Next Steps
Ready to Get Started?
14-day free trial
Stay Updated
Related Articles
DOM Downsampling for LLM-Based Web Agents
We propose D2Snap – a first-of-its-kind downsampling algorithm for DOMs. D2Snap can be used as a pre-processing technique for DOM snapshots to optimise web agency context quality and token costs.
A Gentle Introduction to AI Agents for the Web
LLMs only recently enabled serviceable web agents: autonomous systems that browse web on behalf of a human. Get started with fundamental methodology, key design challenges, and technological opportunities.